Create a New Workflow
MarkovML offers pre-built workflow templates for general use cases, but you can also create custom workflows. To create a new workflow, follow any of the two steps below.
Using the Templates
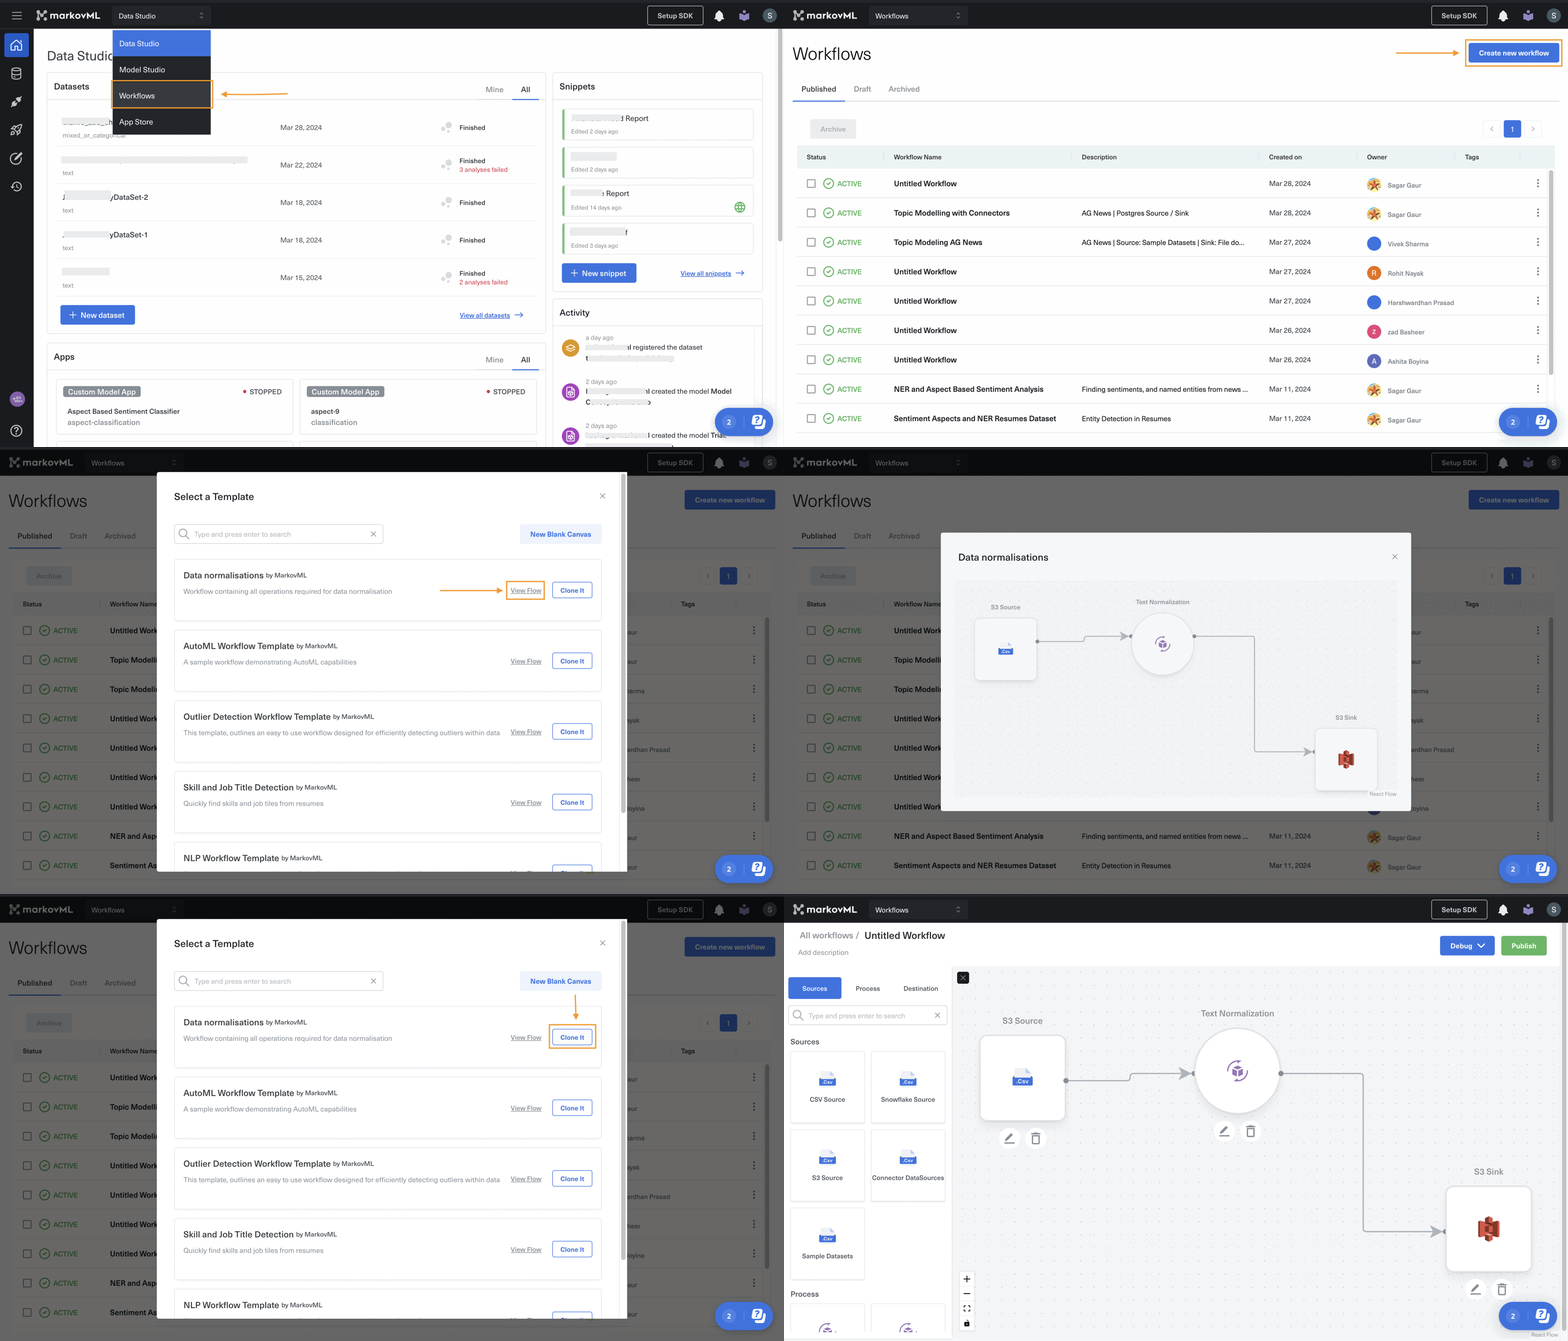
To create a new workflow in MarkovML, navigate to the Workflows section from the top dropdown menu. On the Workflows page, click on the Create New Workflow button. This will open a pop-up box titled Select a Template. Here, you can choose the specific workflow template you want to use.
After you have made your choice, click on view flow to preview the template's workflow. If you are satisfied with the template, click on clone it to create a new workflow based on that template. This process allows you to quickly set up pre-defined workflows tailored to your specific needs.
Once your new workflow is created, you can begin by adding your dataset source. This can be a local .csv file, a dataset previously registered with MarkovML, or any other MarkovML-supported source such as AWS S3, PostgreSQL, or Snowflakes.
Additionally, specify your desired destination i.e., where you want to store the results. This destination can be your S3 bucket, your local system, or within the MarkovML database itself.

Note
By following the above steps, you have created a draft version of the workflow. Once published, workflows cannot be edited. Make sure to review and finalize your workflow before publishing.
Create a Custom Workflow
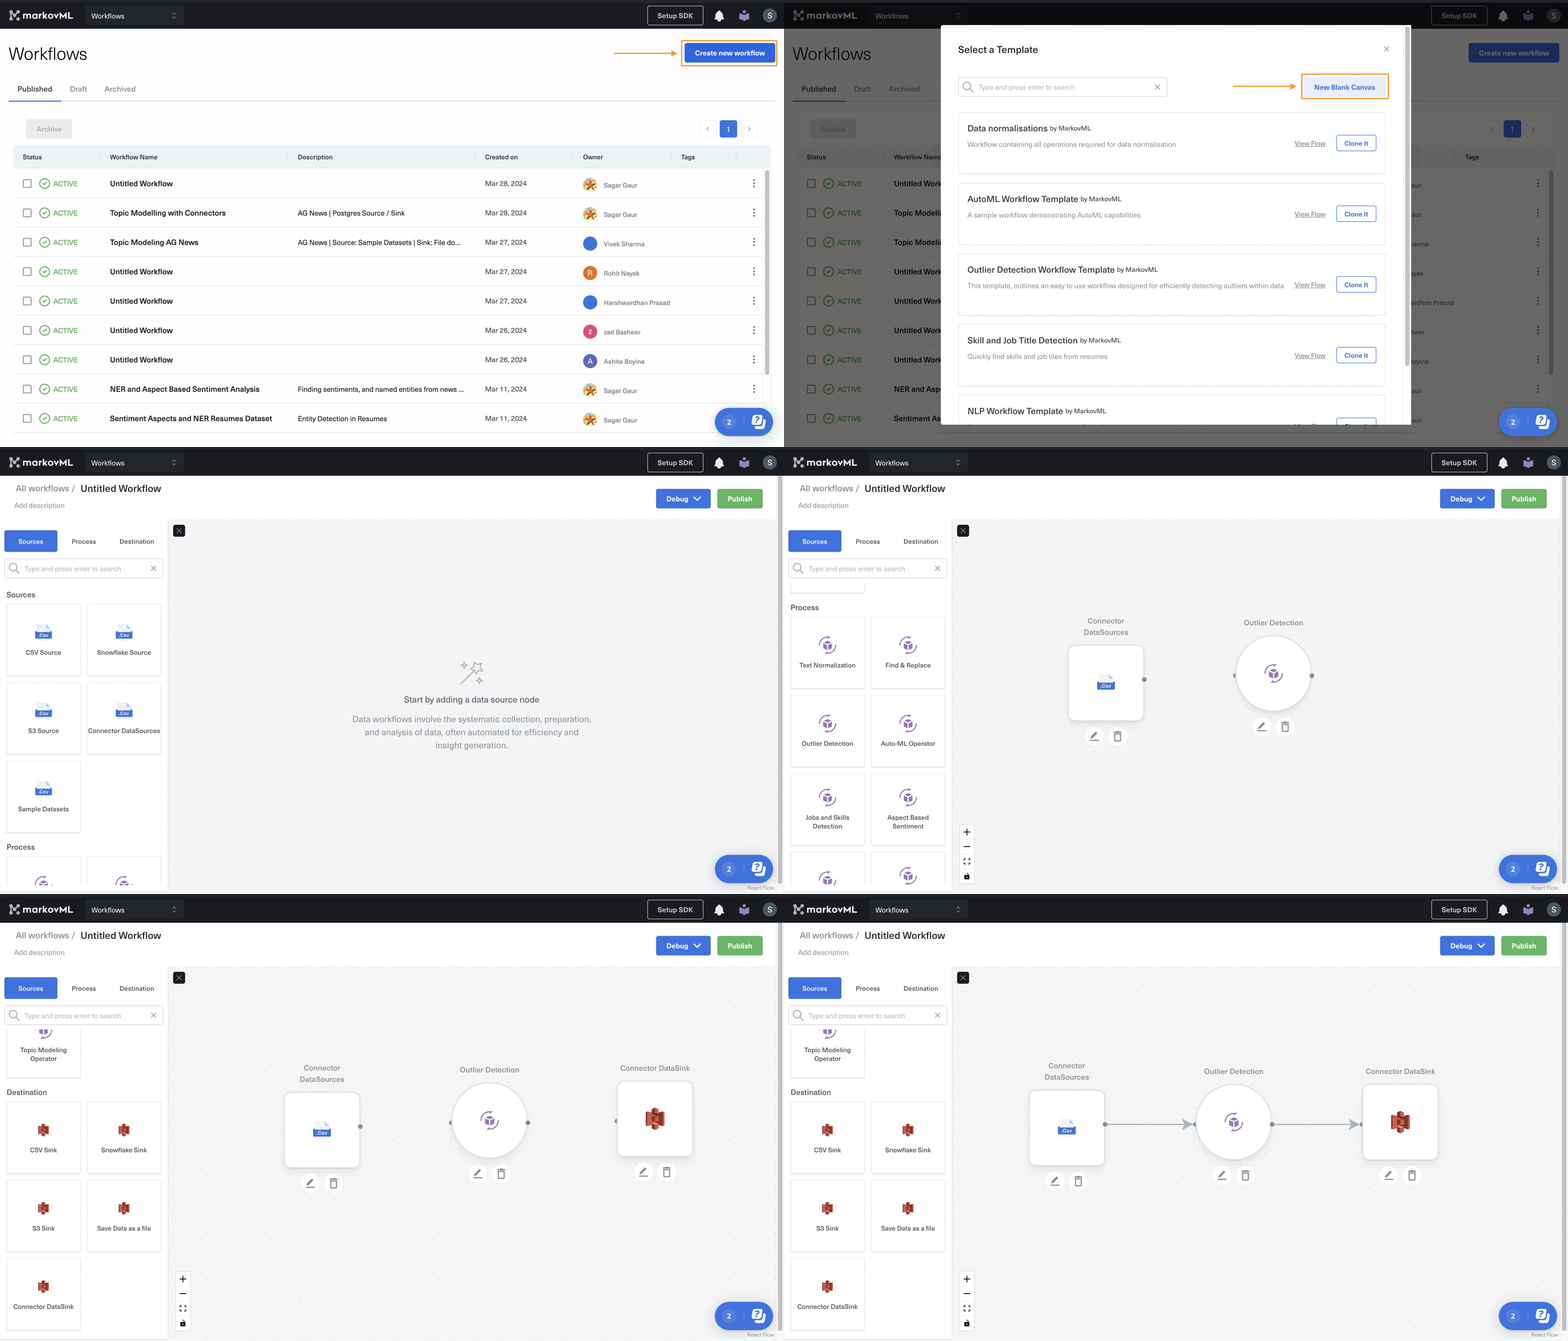
In the previous step, instead of cloning an existing template, click on the New Blank Canvas button in the Select a template pop-up to create a blank workflow. Drag and drop the Connector DataSource to provide the dataset link, add the Process operators, and finally, link it to a Destination DataSink.
Once done with the flow, click on debug to run and test your workflow.
Note
- You can add more than one
processin the order of execution.- Once
Published, no edits can be made to the workflow.

Updated about 1 month ago
