Managing your ML Models
Manage all your machine learning models with easy access to their evaluations and deployment states using MarkovML Models
MarkovML Model vs ML Model
A MarkovML Model is a wrapper around any machine learning model, giving it an identity in the MarkovML platform. MarkovML models help identify how an ML model was trained, how it performs against different datasets, which environment it is deployed in, etc.
Using a MarkovML model, you can do the following:
- Link it to an experiment to track the ML model training process
- Link it to multiple evaluations to track the ML model performance against different datasets.
- Link to the Model Registry to organize, version, and manage deployment history.
Create a MarkovML Model Object
The MarkovML Python SDK allows you to create a new record in the MarkovML model registry along with additional metadata to store a model to be trained. It returns a unique identifier to link and store the trained model artifact.
Using SDK
The code below shows how to create a new model object within a project using the MarkovML Python SDK.
import markov

def get_or_create_project(project_name):
		try:
        project = markov.Project.get_by_name(project_name=project_name)
    except markov.exceptions.ResourceNotFoundException:
        project = markov.Project(name=project_name)
        project.register()

    return project

PROJECT_NAME = "Text Classification"
MODEL_NAME = "Emotions Classification using Pytorch"

project = get_or_create_project(PROJECT_NAME)
model = project.create_model(
		model_name=MODEL_NAME,
    model_description="Pytorch model using torchtext embeddings and dense nn layer",
    model_class=markov.ModelClass.CLASSIFICATION,
)

# The model object is registered with the backend an entry is created in the model registry
# to receive a trained model artifact downstream.
model.register()
Model Registry
Model Registry is designed to help you organize, version, and manage model deployments. It offers the following benefits:
- Organize your critical models efficiently.
- Automatically version each model in the registry for easy tracking.
- Specify the deployment stage of each model in the registry as
Development,Staging, orProduction. - View the stage transition history to track deployment changes. (Coming soon)
Working with Model Registry
The model registry can be utilized through:
- UI
- SDK
Using UI
1. Create a new Model Registry
You can create multiple model registries within the MarkovML platform, each associated with a model deployment.
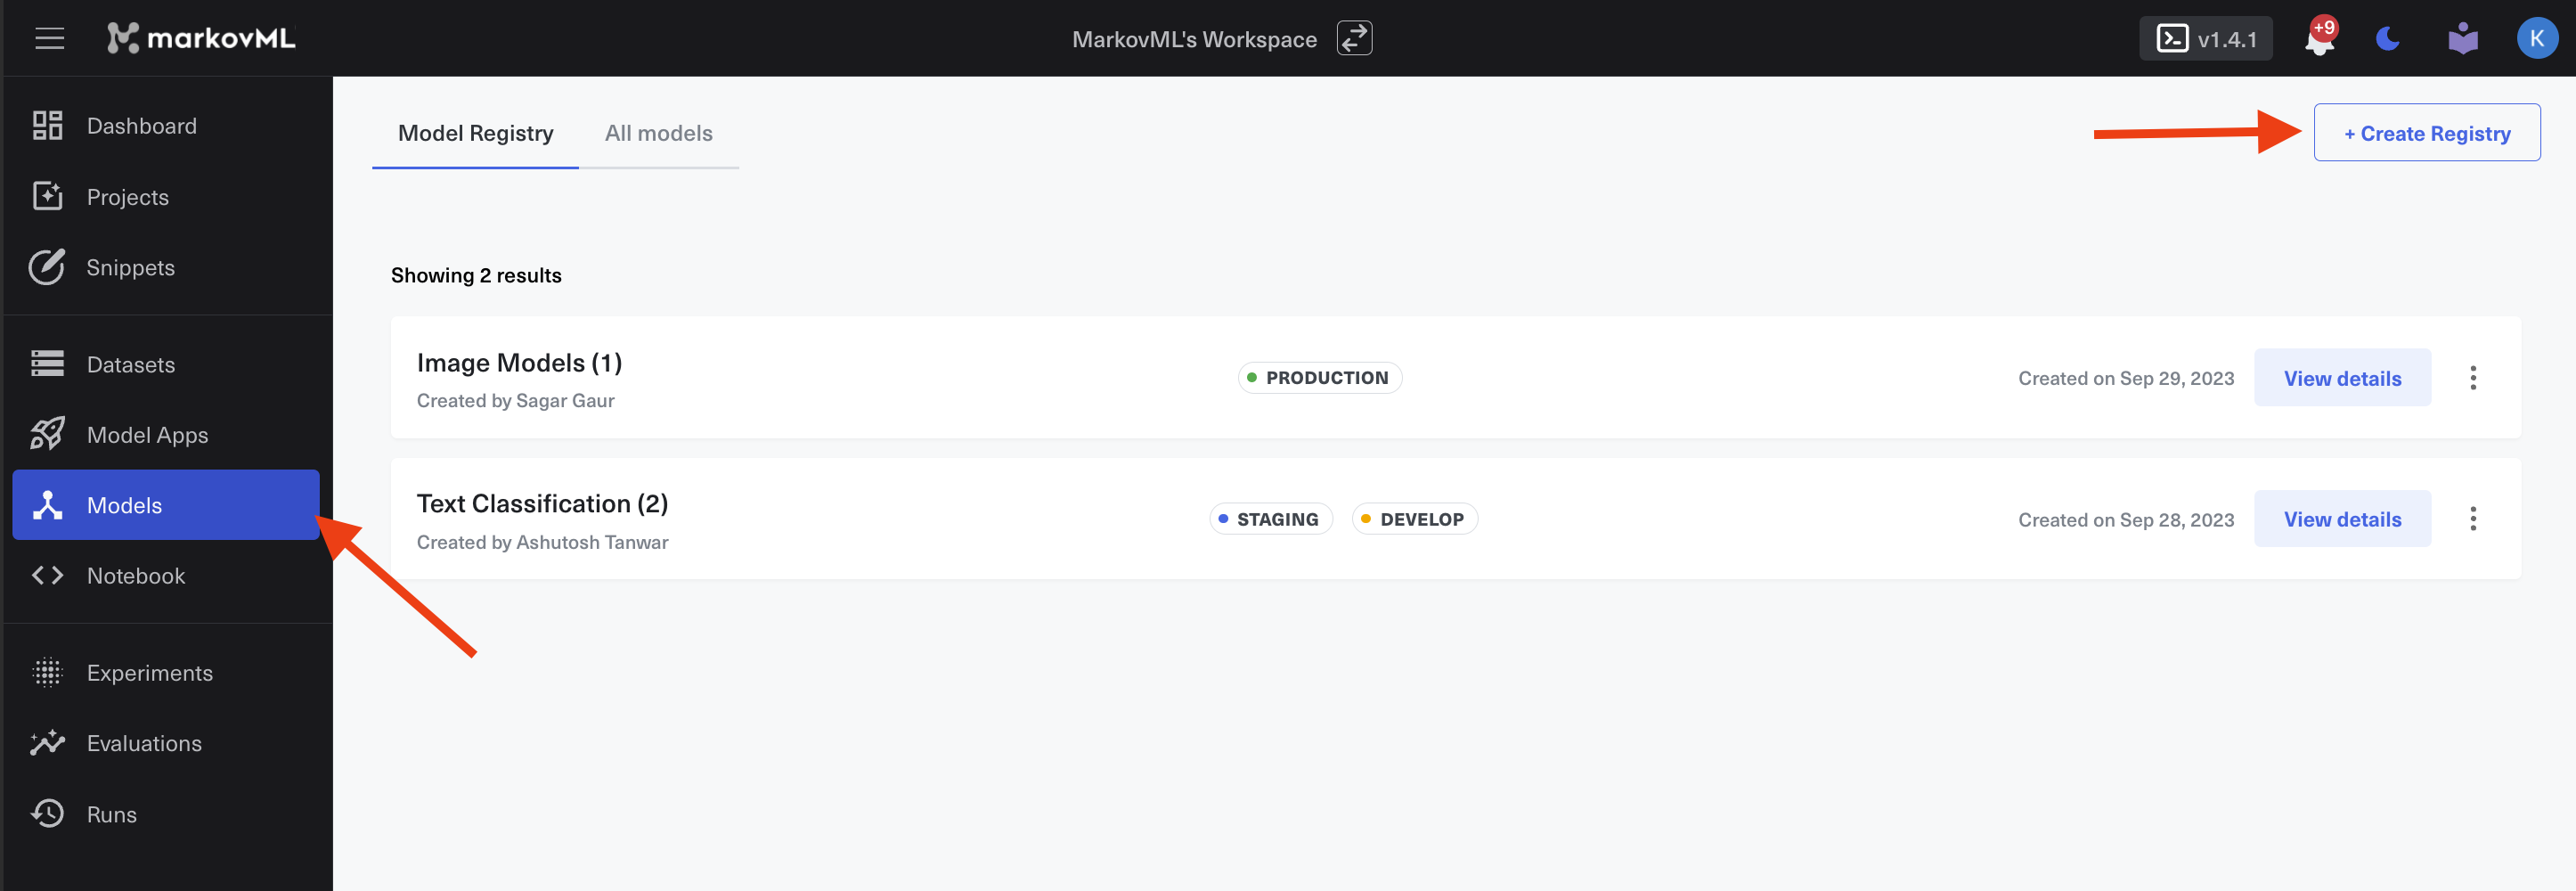
Step 1: Navigate to the Models section in the MarkovML Platform.
Step 2: Click the Create Registry button located at the top right of the page.
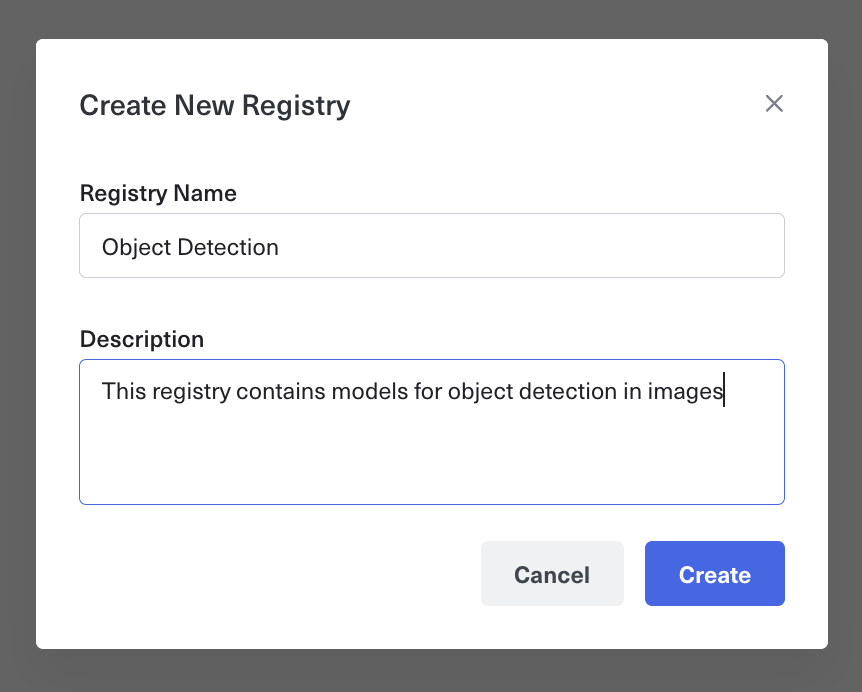
Step 3: Provide a name and description for the registry, then click Create.
2. Link models to Model Registry
Step 1: Navigate to Models → All Models.
Step 2: Click on the three dots menu of the model you want to link.
Step 3: Click Link to registry.
Step 4: Choose the registry you want to link to and press Link to.
3. Transition stage of models in the registry
You can mark the models' deployment stage in the registry.
Using SDK
There are two ways you can store the model with the MarkovML registry.
- Registering as
Markov Flavor Model. Our Model App framework that enables launching the model as a hosted web application requires the model to be aMarkov Flavor Model - Registering as
Files or Binary. This will store your model or model files in the registry and is not supported by the Model App Framework. You can use SDK to store and retrieve those.
Registering as Markov Flavor Model
Step 1: Create a Model Store Object.
import markov

def get_or_create_project(project_name):
		try:
        project = markov.Project.get_by_name(project_name=project_name)
    except markov.exceptions.ResourceNotFoundException:
        project = markov.Project(name=project_name)
        project.register()

    return project

PROJECT_NAME = "Text Classification"
MODEL_NAME = "Emotions Classification using Pytorch"

project = get_or_create_project(PROJECT_NAME)
model_object = project.create_model(
		model_name=MODEL_NAME,
    model_description="Pytorch model using torchtext embeddings and dense nn layer",
    model_class=markov.ModelClass.CLASSIFICATION,
)

# The model object is registered with the backend an entry is created in the model registry
# to receive a trained model artifact downstream.
model_object.register()
Step 2: Create an Inference Pipeline
from markov.api.models.artifacts.inference_pipeline import InferencePipeline
from markov.library.dependencies_helper import pytorch_pip_requirements
from markov.library.mlflow_helper import MarkovSupportedFlavours

# markov imports
from markov.api.models.artifacts.base import (
    MarkovPredictor,
    MarkovPyfunc,
   infer_schema_and_samples_from_dataframe,
)

# The place holder to retrieve trained Pytorch Model from your training pipeline
clf = get_trained_model()

# Take some samples from your dataset
sample_input = pd.DataFrame([{"content": samples}])

# You can use the utility `infer_schema_and_samples_from_dataframe` to convert your input dataframe
# into schema and samples in the format accepted by Markov backend
schema, samples = infer_schema_and_samples_from_dataframe(sample_input)

# Create an inference pipeline
my_inference_model = InferencePipeline(
    name="pytorch-text-classifier-demo", # human readable name of the classifier
    schema=schema,    # mandatory
    samples=samples,  # optional
)

# Adding the model to the InferencePipline.
# here name is your given name, clf is the trained model, and flavour is the framework that was
# used to traind the model. We Support Scikit-learn, XGBoost, LiteGBM, Keras natively.
my_inference_model.add_pipeline_stage(
    stage=MarkovPredictor(
        name="pytorch_predictor", model=clf, flavour=MarkovSupportedFlavours.PYTORCH
    )
)# model is the trained model

# Register the inference pipeline with MarkovML. This registeres the model artifact and the
# inference pipeline with MarkovML Model Registry to enable single click launch of modelapp and
# web service. The model_id is the identifier of the model store object created in the Model Store.
my_inference_model.register(model_id=model_object.model_id)
Updated 6 months ago